Simple Vegetarian Quesadillas with Traditional Guacamole

Can you believe it has been six months since the lockdown? It feels like an eternity with the constant news cycle of mostly negative and sad news. Here in Northern California, the wildfires started earlier and raged stronger this year and are still burning through a record area. In addition to being in lockdown, we also could not go on our nature hikes due to the poor air quality. Taking it one day at a time and praying for those less fortunate – it’s all that one can do to keep one’s sanity.

Meanwhile on the personal front, Amma is back with us and finished her travel quarantine period. Her return is a huge relief to both of us. Things always get interesting in the kitchen when she is here, and this time more so, since both of us are home all day! Her repertoire is mostly South Indian cooking with some North Indian dishes thrown in for variety. I try to mix it up and she tolerates it like a good sport.

veggie quesadilla

I cannot say this vegetarian quesadilla with guacamole was necessarily one of her favorites but V and I really enjoyed it. This is a simple, easy to make recipe which comes together in no time with whatever veggies you have on hand. You can have it as a snack or even a full meal. I used onions, greens and red bell pepper. Feel free to use a combination shredded cabbage, mushrooms, corn, zucchini, squash, sweet potato and even black or pinto beans. Here is the basic recipe.

Recipe for Vegetarian Quesadilla with Traditional Guacamole

[Printable Recipe]

Makes 4 servings (2 tortillas per person)

Ingredients for the traditional guacamole (from La Vida Verde cookbook):

  • 2 large avocados
  • 1 firm ripe tomato, chopped
  • 2 Tbsp lemon juice
  • 1 jalapeno or other spicy green pepper, minced fine (leave it out if you don’t like it spicy)
  • 1 Tbsp finely chopped cilantro
  • salt to taste

Ingredients for the quesadilla:

  • 8 medium tortillas of your choice (I used corn/wheat)
  • 1 Tbsp vegetable oil
  • 2 cups of arugula (or any other greens of your choice)
  • 1 medium onion sliced thin
  • 1 medium red bell pepper sliced thin
  • 1 cup of grated cheese (Monterey jack works well or any other hard flavorful cheese which melts)
  • salt and pepper to taste

Method:

To make the guacamole:

  • Peel and scoop avocado in to a bowl
  • Add all the other ingredients and roughly mash together 

To make the quesadilla:

  • Make the filling:  In a pan, heat the oil and saute the onions, bell pepper for a few minutes.  Add salt to taste.  Add the greens, mix and allow it to wilt.  Set aside.
  • Heat a large skillet (cast iron preferably)
  • Place the tortilla on the hot skillet and cook until a little browned on both sides, flipping for around 2-3 mins
  • Lower the heat and sprinkle one half of the quesadilla with cheese until well covered.  You might use about a tablespoon for a large tortilla.  I went lighter with cheese.
  • Top with the vegetable filling using 2-3 tablespoons
  • Sprinkle with more cheese
  • With a spatula, folder the tortilla over to cover the filling and press down 
  • Increase the heat if needed and allow the cheese to melt and the quesadilla to brown a bit (a minute or so)
  • Flip carefully to brown the top side as well (a minute or so)
  • Remove and set aside and repeat with the next one

Serve the tortillas hot with guacamole or a salsa of your choice if you prefer.

Making a veggie quesadilla

Hope you enjoy this simple quesadilla. V and I are trying to remind ourselves every day to find joy in the simple things in life and appreciate every small blessing. Stay safe and stay sane everyone!

Baked samosas

A small treat now and then during these hard times makes us feel so good, doesn’t it? Not that I am complaining when I say “hard times”. I do realize how fortunate we are compared to many others. Sometimes I do feel guilty about enjoying our al fresco lunches in the garden (especially lovely now with all the spring flowers and hummingbirds) and our lazy evening walks.

A beautiful piece of writing titled “It’s okay to be okay during the pandemic” by Sigal Samuel in vox.com put things in perspective for me and I do recommend reading it fully, but the author sums it up with a quote from a mindfulness teacher: “Taking care of ourselves is the first approximation of mindful compassion.”

We have not been eating out obviously but we have been doing takeaways from our favorite vegan Chinese restaurant mainly because it gives us a chance to drive somewhere once a week (the restaurant is a good 20 min drive away), support the business and get some variety in our meals. But I have also been trying to keep it interesting at home.

This baked samosa that I made as a weekend teatime snack turned out to be very addictive and was pretty easy to make. V and I devoured almost all of it over a game of Scrabble and had to forego dinner as we were so full! We used “zhoug sauce” that we got from Trader Joes as a dipping.

Recipe for Easy Baked Samosas

[Printable Recipe]

Inspired by “Baked Pea Samosas” recipe in Vegetarian Dinner Parties by Mark Scarbrough and Bruce Weinstein 

Makes around 12-15

Ingredients:

  • 4-5 medium potatoes
  • 1 cup frozen green peas
  • 1 Tbsp vegetable oil + approx 1/2 cup for brushing the phyllo sheets
  • 1-2 Thai green chilies chopped fine (optional)
  • 1 tsp garam masala
  • 1/2 tsp salt or more to taste
  • 1 package of Phyllo sheets (you will not use it all for this batch, so double the recipe or save it for later as per the package instructions)

Equipment:

  • 2 rimmed cookie sheets
  • 1 sharp knife

Method:

  • Filling: (You can make the filling ahead of time and store in the refrigerator)
    • Wash and cut the potatoes in to quarters
    • Cook the potatoes till soft, then set aside to cool
    • Soak the frozen peas in boiling water till thawed and wash
    • Peel and coarsely mash the cooled potatoes
    • Heat 1 Tbsp vegetable oil in  a pan and add the minced green chilies if using 
    • Add the mashed potatoes and green peas, garam masala and salt and mix till heated through
  • Pre-heat oven to 375C
  • Remove one phyllo sheet from the package (keep the rest covered to prevent them from drying out.  Follow the instructions on the package).
  • Brush the sheet with some oil, then fold it lengthwise, then into thirds as shown in the picture below brushing the sheet with some oil on each fold
  • Using a sharp knife make vertical slits around 1 inch deep on all 4 sides of the folded sheet as shown
  • Place about one heaping tablespoon of filling in the middle and fold the edges over the filling like a pocket.  Place it on a baking sheet
  • Continue making the pockets until the filling runs out lining them up on the sheets
  •  Place the sheets in the pre-heated oven.  
  • If you have 2 sheets, set a timer for 9 minutes.   The total baking time is 18 minutes but you would want to rotate the trays from top to bottom half way through
  • Remove after 18 minutes and let it cool a bit before enjoying with a dipping of your choice.  We thought the “zhoug” sauce from Trader Joes was excellent but you could use ketchup or sriracha as well.
Steps for making the samosas

Easy Lima Bean Snack

The recent rains have brought back memories of how paradisiacal it used to feel hiking the trails of California.   After four years of drought, it feels so great to squelch in wet mud rather than tread on parched earth.  I can’t wait to see what this spring brings forth.  It seems like it has been forever since we had a proper one with abundant seasonal waterfalls, vast fields of swaying wildflowers and baby deer, quail and rabbits galore.


But, let me not count my quails before they hatch.   We still need steady rains through February and March and maybe some April showers to bring us May flowers.

The year however is off to a running start and January is already over!  One of the new year’s resolutions V and I made is to have friends over more often to our place for food and fun.   And that’s exactly what we did last weekend.  To accommodate everyone’s health needs, we kept the menu simple, sugar-free, and minus any fried foods.


One of the appetizers on the menu was a simple, nutritious snack with frozen Lima beans.   This is a variation of an ubiquitous South Indian snack called “sundal”.    In its most basic form, sundal comprises simply of cooked beans (of any kind) tempered with mustard seeds, red chilies, and grated coconut. The most common sundal is made with chickpeas or garbanzo beans.   Sundal is also a quintessential street food in South India.  On the beaches of Chennai, sundal served in newspaper cones, gets an interesting twist with the addition of raw mango pieces!   Yummy!   The recipe below is very simple in comparison but quite tasty.


Recipe for a simple Lima bean snack

[Printable Recipe]

Ingredients:

  • 2 packs frozen baby Lima beans
  • 1 Tbsp vegetable oil (You can use coconut oil as well)
  • 1 tsp mustard seeds
  • 2 dried red chilies, broken in to 2 pieces
  • 2 Tbsps yellow lentils/split chick peas (chana dal in Hindi – you can find it in an ethnic Indian grocery store)
  • Optional – 1 pinch asafoetida (hing in Hindi – you can find it in an ethnic Indian grocery store)
  • Optional – 1 sprig Curry leaves (you can find fresh or frozen curry leaves in an ethnic Indian grocery store)
  • Grated coconut (you can find frozen packs of freshly grated coconut in an ethnic Indian grocery store, but feel free to use dried unsweetened coconut flakes if you cannot find grated coconut)
  • Salt to taste

Method:

  • Rinse the frozen lima beans under running water in a colander and set aside to drain
  • Heat the oil in a pan
  • Add the mustard seeds when the oil is hot and when the mustard seeds sputter, add the red chilies and yellow lentils.   Lower the heat and stir until the lentils are golden in color – around 2-3 minutes.  Be careful not to let it burn.  (The lentils add a bit of crunch to the recipe.)
  • Add the asafoetida and curry leaves if using
  • Finally, add the grated coconut and saute on low heat for a couple of minutes
  • Add the drained lima beans to the pan, and add salt to taste
  • Close with a lid and let it cook for around 10 mins on low heat occasionally giving it a stir
  • Serve warm or at room temperature


This appetizer was a big hit at our dinner party.   Little did our guests know that hardly any effort went in to making this nutritious, filling, delicious snack.   You can also make this recipe with chickpeas, blackeyed peas, fresh peanuts and a variety of other beans!

Vegan Banana Bread with Fresh Figs

I have the best ever banana bread recipe!  A friend of mine typed it and printed it out for me years back and it is one of my most-prized recipes.  Dog-eared and creased as it is from years of handling, it has never ever failed me and makes the most perfect 2 loaves of bread in a jiffy!   Unfortunately it is not vegan!     Finally I think I have found a way to veganize it and make it sugar-free without compromising texture or taste.

banana-bread-2-3

Did I tell you about my current obsession with figs?  Fall in California brings exotic, sexy fruits like persimmons, figs and pomegranates to the local markets.  I have a strange (imaginary?) allergy to persimmons but I happily gorge on both figs and pomegranates freely at this time of year.

You already know how I love cooking with dried figs, like the No-bake Fig Energy Balls and the Fig and Oat Bars.   This time I used fresh ripe seasonal figs in my recipe.  The purple California Smyrna figs are so pretty that I could not just bury them inside the batter.  I wanted to show off their seedy beauty and hence decided to place them cut-side up on top of the bread.

Banana Bread with Fresh FigsHere’s the veganized version of my favorite banana bread recipe with fresh figs.  It also does not have any added sugar and is sweetened entirely with fresh and dried fruits.

My stained dog-eared copy of the original recipe (not vegan).  Credit: My friend K

Recipe for Vegan Banana Bread with Fresh Figs

[Printable Recipe]

Equipment:
  • Hand mixer
  • Blender
  • 2 loaf pans (I have 2 Pyrex 9″x5″ loaf pans that I love and have used for ever)
  • Convection Oven
 Ingredients:

Dry:

  • 1 cup whole wheat flour (almond flour would work well if you want to go gluten free) + about a tablespoon for the pans
  • 1 cup golden flax meal
  • 1 tsp baking soda
  • 1 tsp baking powder
  • 1/4 tsp salt
  • 1/2 cup chopped walnuts
  • 2 Tbsp of brown sugar (or turbinado) (optional)
Wet:
  • 5 dates and 4 dried apricots or figs, rinsed and soaked in warm water for 1/2 hour
  • 1 large apple  (Or 1/2 cup apple sauce)
  • 1/2 cup avocado oil (you can use any vegetable oil or coconut oil)
  • 3 very ripe bananas
  • 1 tsp vanilla
  • About 20 small figs or 10 large ones
  • A little coconut oil for coating the pans
Method:
  • Preheat over to 350F
  • Grease the pans with coconut oil and dust with flour
  • Combine all the dry ingredients except walnuts in a large bowl
  • Puree the soaked dates and apricots with about 1/4 cup of the soaking water
  • Peel and cut the apple and puree in a blender (or use apple sauce)
  • Peel and mash the ripe bananas
  • Add the wet ingredients to the bowl and use a hand mixer to mix thoroughly
  • Mix in the walnuts
  • Scoop in to the prepared loaf pans and shake to even the surface
  • Cut off the stems of the figs and cut them vertically in to halves
  • Press in to the batter, cut side facing up
  • Bake in oven for around 45 mins to an hour until a toothpick or knife inserted comes out clean
  • Optional step:  About 5 minutes before the end of the baking cycle, sprinkle about a tablespoon of brown sugar or turbinado on top of the figs in each loaf pan and continue to bake
  • Place on a cooling rack to cool, slice and enjoy

Since it is sweetened entirely with fruit we have it for breakfast or an afternoon pick me snack.


banana-bread-3-3

Do you have other recipes to satisfy my fig cravings?  Do share!

Oat Bars with Peach Jam Filling

Just imagine what the Silicon Valley might have looked like about 50 years back.  Back then it was known as the Valley of Heart’s Delight for its natural beauty, temperate climate and acres of arable land producing the sweetest stone fruits like plums and peaches and apricots.   As one drives through the streets and highways, one can still see signs of this fruitful past, from the scattered existence of small orchards that are left behind.   Every home has at least one citrus or stone fruit tree which yields more than enough to eat, preserve and share with neighbors.

Peaches

How can one resist the juicy allure of these fruits – the soft peaches, the vibrant apricots, shiny nectarines, deep red plums, not to mention wonderful cross breeds like pluots and apriums and what not!  In summer, the farm stands along the Central Valley highways and local farmers markets display a colorful variety of these “drupes“, which is what such stone fruits are called.  And towards the end of summer when the fruits are at the peak of their sweetness, I give in and end up making at least one batch of jam for nostalgia sake.

Time seems so scarce in today’s Silicon Valley that many do not bother to even pick the fruits in their backyard leave alone preserve for winter.  In Michael Pollan’s “Cooked”, he talks about “real scratch cooking” becoming as rarefied as darning socks.   When I lived in the Sacramento area, making several batches of jams and preserves towards the end of summer was de riguer,  a fun activity usually done with a group of friends.  My friend K, the uber expert in cooking anything and everything from scratch, used to have a bunch of us girls over for ‘jamming’.   Sigh! What fun that was!

Peach Jam

This year my nod to nostalgia was a small batch of chunky peach jam with the sweetest peaches one can sink their into.  V and I really do not consume that much jam not being big toast eaters for breakfast.  So I use the jam for desserts, mostly as a compote topping for puddings or ice creams.  Or I give it away to friends and family.

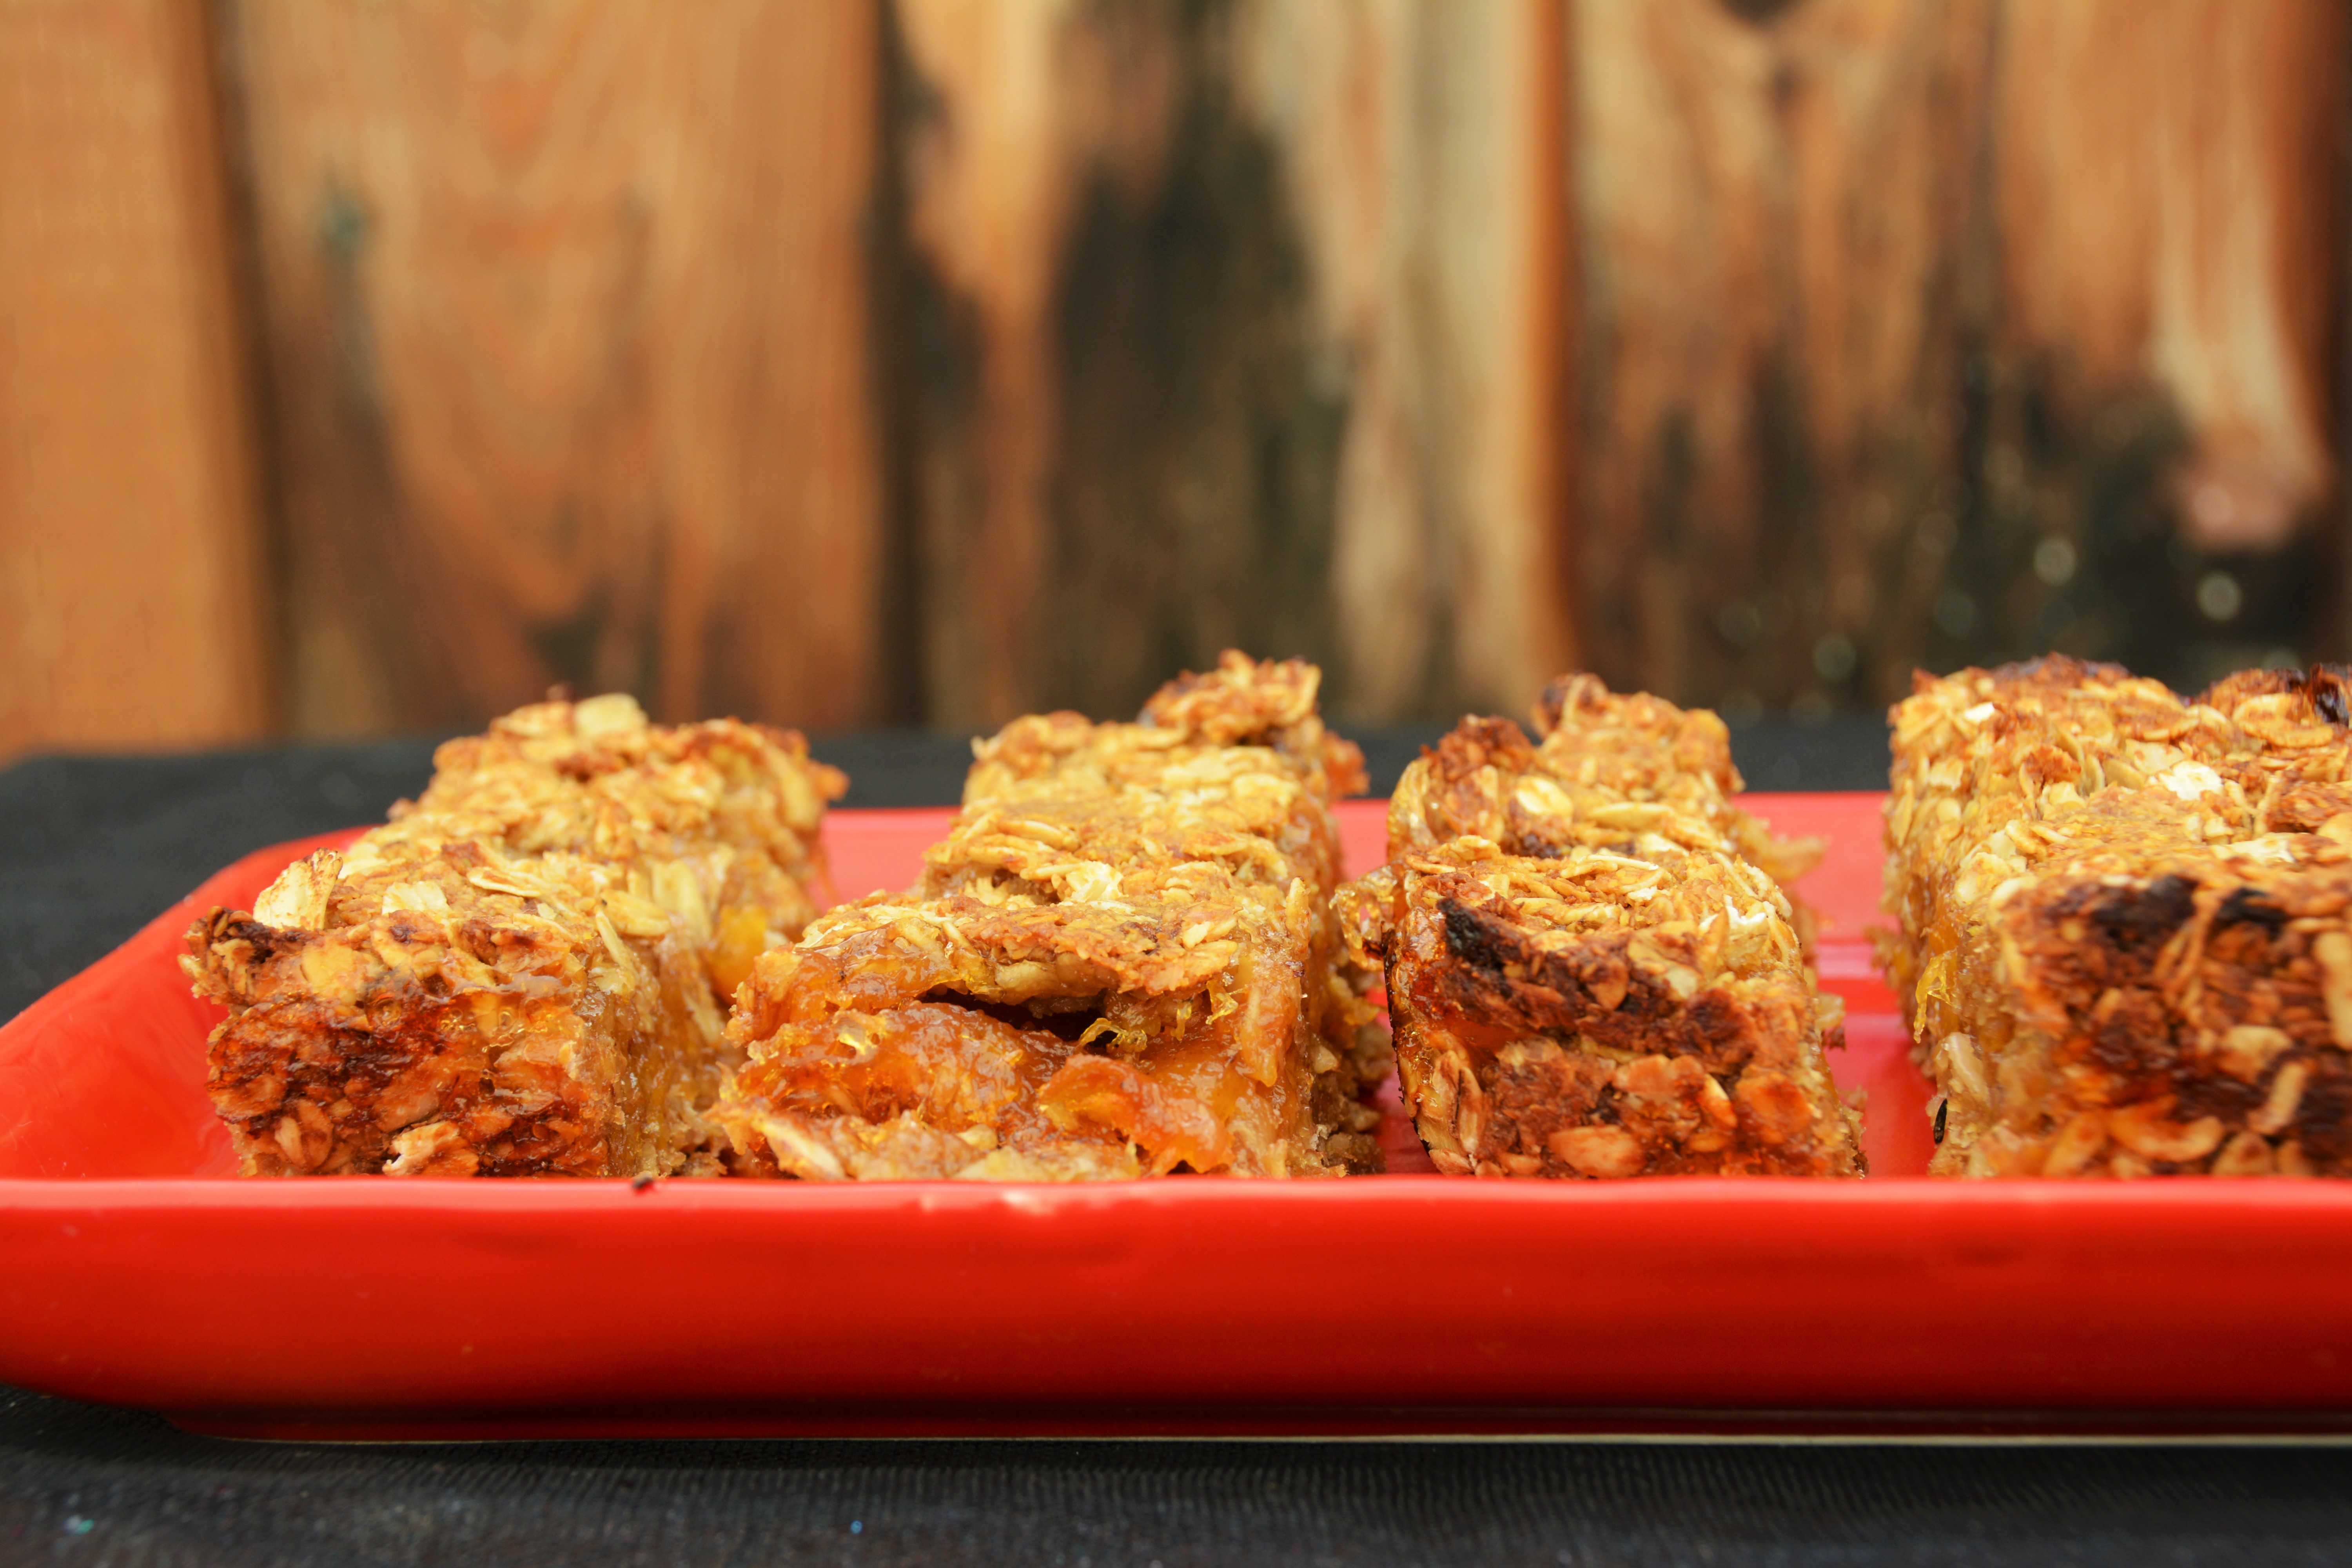
Oat bars with peach jam filling

What came together this time was a chewy oat bar with a tart, sweet chunky peach jam filling.  The crust itself is not too sweet at all as it contains no sugar whatsoever, though it is lightly sweetened with fruit sauce.

Recipe for Oat Bars with Peach Jam Filling

[Printable Recipe]

Makes around 15 bite sized squares

Ingredients:

  • 1/2 cup store bought apple sauce or home-made apricot or date sauce
  • 1 1/4 cup rolled oats (not quick cooking, buy gluten-free oats if you are sensitive)
  • 3/4 cup ground flax seeds / flax meal
  • 1 tsp salt
  • 1 tsp powdered ginger
  • 1/4 cup melted coconut oil (use melted butter if you are not vegan)
  • Optional: 1/3 cup of brown sugar if you like some more sweetness in the crust
  • 1 cup chunky peach jam

Method:

  • Preheat over to 375F
  • Dot a 9″x5″ loaf pan with coconut oil and line with parchment paper such that some of the paper hangs over the sides like a handle
  • To make apricot or date sauce, soak 1/2 cup of pitted dried fruit in hot water for 30 mins. Drain and grind well in to a paste using a few tablespoons of water to get sauce consistency
  • Combine the dry ingredients in a bowl
  • Add the fruit sauce and coconut oil and fold.  Divide in to two parts
  • Using fingers, press half the oat mixture in to the prepared loaf pan
  • Spread the peach jam evenly on top
  • Distribute the remaining oat mixture on top of the jam and press
  • Bake for 30 mins
  • Let it cool and cut in to bars or squares.  I got about 15 small bite-sized squares from the loaf pan

Oat bars with peach jam filling

The bars were just perfect with the right amount of sweetness and tartness from the peach jam and chewiness from the oat-flax mixture.   And just the most perfect grab and go snack.

No-Bake Fig Energy Balls

I currently have my teeth sunk in to a meaty book called Meathooked – The history and science of our 2.5 million year obsession with meat by Marta Zaraska.   So far, the book has presented a very balanced view of why humans started eating meat and continue to do so despite other sources of sustenance.  It also shows that many arguments on both sides (from the “paleo” diet proselytizers as well as from the vegetarian diet proponents) have merit.  So far, the book has not taken any sides.  I am waiting for the punch line!

In the meantime, my obsession with dried figs continues.  A lot of the no-sugar recipes call for using dates or date sugar to add sweetness. I think figs would work just as deliciously.   
No Bake Fig Energy Balls
Last weekend was a sweltering one again and I did not wait to turn on the oven.  So I decided to make some no bake energy balls sweetened just with figs.  The inspiration for the recipe came from several sources online for “bliss balls” but I totally made this one up as I went along.
No Bake Fig Energy Balls

Recipe for No-Bake Fig Energy Balls
Makes around 15 balls
Ingredients:
  • 8 oz (around 10) dried California figs (I picked up a bag from Costco)
  • 4 oz (around 1 cup) quick cooking oats (opt for gluten-free if sensitive)
  • 4 oz (around 2 cups) dried coconut flakes (I got this from the bins at Whole Foods)
  • 4 Tbsp almond butter (~2 oz)
  • 4 Tbsp raw cacao powder for dusting
Method:
  • Soak the dried figs in enough warm water to cover for around 15 mins
  • Dry roast the oats in a pan on low heat until it smells nutty and fragrant
  • Dry roast the coconut flakes on low heat for around 5 minutes until fragrant
  • In a food processor, grind the oats and coconut flakes together to a not-too-fine powder
  • Drain the water from the figs, chop roughly and add to the food processor
  • Add the almond butter and 2 tablespoons of cacao powder to the food processor 
  • Pulse until it forms an uniform mass and remove from the food processor
  • Roll in to balls and dust with remaining cacao powder
  • Store in an airtight container in the refrigerator

No-Bake Fig Energy Balls

You won’t be able to stop popping these delicious balls in to your mouth.  They are so sweet you won’t beleive there is no sugar in them!    We have been having them for breakfast every morning with a boiled egg, some home-made sauerkraut and a few slices of avocado.

No-bake Fig Energy Balls

(I apologize for the appearance of the blog.  I am working on getting a new cleaner look and have somehow managed to mess things up.   I promise to fix it soon!   In the meantime, I could not resist posting this recipe!)

Fig and Oat Bars with No Added Sugar

Here in Northern California, it has been a sweltering Memorial Day weekend with more heat in store for the week ahead.  We spent most of the weekend hunkered down inside the house except for a day trip to Folsom to see our dear friends.  We both love Folsom and the heat did not deter us from having a lovely lunch at Karen’s Bakery by the river.  The food was amazing, the service was gracious and as always the people in Folsom, very friendly.

Fig and Oat Bars

Very rarely do we stay home for a long weekend, but it gave me a chance to catch up on blogging as I have missed a couple of weeks recently.  I also have been looking for a couple of new designs for the blog to make it more user-friendly.  Wait and watch for the changes!

Speaking of the heat in California, everyone’s yard in Folsom is dry and brown but the fruit trees as laden with delicious apricots and plums.  I came back from Folsom with a handful of golden yellow apricots from someone’s yard.  Figs, I believe would start ripening around end of June, but I got some dried ones from Costco which I decided to put to good use when I have been hanging out at home this weekend.

Fig and Oat Bars

V loved the low-carb grain-free coconut and multi-seed bars I had made a couple of months back, so I decided to try a new recipe.  Now that he has eased off his low-carb diet, I was free to use some grains as well.  But I avoided sugar or any artificial sweeteners altogether and instead used ripe bananas to provide sweetness.

Fig and Oat Bars

Recipe for Home-made Fig and Oat Bars with No Added Sugar
[Printable Recipe]

Wet Ingredients:

  • 8 oz (around 12) dried figs
  • 4 Tbsp ground flax seeds
  • 1/2 cup coconut oil
  • 3 medium very ripe frozen bananas, thawed and mashed up
  • warm water

Dry Ingredients:

  • 2 cups quick-cooking rolled oats (look for gluten-free if you are sensitive)
  • 2 Tbsp raw cacao powder
  • 1 tsp maca powder (optional)
  • 1/4 cup Costco Super Smoothie protein mix (optional)
  • 1 tsp baking powder
  • 1/4 tsp salt
  • 2 Tbsp raw hemp seeds
  • 1/2 cup dried coconut flakes

Method:

  • Pre-heat oven to 350C
  • Dot a 9×13 inch pan with coconut oil and line with parchment paper
  • Soak the dried figs in warm water to cover for around 15 minutes
  • Make the flax “egg” by mixing the ground flax seeds with 1/2 cup warm water.  Set aside for around 10 mins
  • Mix the dry ingredients thoroughly in a large bowl
  • Fold in the flax “egg”, coconut oil and mashed bananas until well-combined
  • Discard the water and chop the soaked figs roughly and add to the mix
  • Pat the mixture in to the pan and smoothen the surface with fingers or a flat spatula
  • Bake for 20 minutes
  • When it has cooled a bit, scour in to bars.  Let cool completely and store in an airtight container
Fig and Oat Bars
The bars turned out pretty sweet and the figs were a great addition as they provided a lot of texture. It would make a perfect addition to our breakfast this week! 

Low-carb Goji Berry Energy Bars

Last week’s low-carb protein bars were so good, they disappeared within a few days.  We had them mostly for breakfast with a slice of avocado or some berries.  V declared on Friday evening that he refused to go without them for breakfast this week!  Obviously I was not going to repeat the same recipe, so I cooked up a different one.

Goji Berry Energy Bars

Also, in the meantime, I have finished reading Unprocessed: My City-Dwelling Year of Reclaiming Real Food by Megan Kimble.  I thoroughly enjoyed her very down-to-earth, funny and unpretentious tone.  She is simply writing about her dilemmas, her experiences and her learnings, not dictating what is right and wrong. There are a million experts on food and nutrition who pontificate every day only to be proven wrong the very next day.  She also has very concise takeaways for every food group at the end of each chapter which I found useful.  

Goji Berry Energy Bars

I made this week’s breakfast bars with goji berries which I have never cooked with before.  I had a Chinese colleague at work who would brew up a big mug of tea with dried goji berries and sip it all day long.  He claimed that it was very good for the eyes.  He was always willing to share a spoonful of the pretty red berries with me.  I loved the taste of the tea and eating the berries softened by the hot water at the end of the mug.
So here it is, an experimental recipe again!  Goji berry bars!  I was at Whole Foods to pick up dried blueberries but spotted the goji berries and went for it.  About 2 cups cost around $12, making this a pretty expensive ingredient.

Goji Berry Energy Bars

Recipe for Low-carb Goji Berry Energy Bars
[Printable Recipe]

Dry Ingredients:
  • 1 cup coconut flour (substitute with almond flour if desired)
  • 3 Tsp raw cacao powder
  • 1 Tbsp maca powder
  • 1 tsp baking powder
  • 2 Tbsp raw hemp seeds
  • 1/2 cup raw sprouted pumpkin seeds
  • 2 cups dried goji berries (from the bin at Whole Foods)
  • 2 pods cardamom, seeds removed and powdered <or> 1/2 tsp cardamom powder (optional)
  • 1 tsp salt (optional)
Wet Ingredients:
  • 1 cup water to make flax-chia egg:
    • 8 Tbsp ground flax seeds 
    • 1 1/4 cup cool water
  • 1/2 cup coconut oil
  • 1/4 cup organic blackstrap molasses
  • 4 drops liquid stevia

Making Goji Berry Energy Bars

Method:

  • Pre-heat oven to 375C
  • Dot a 9×13 inch pan with coconut oil and line with parchment paper
  • Make the flax “egg” by mixing the ground flax seeds with 1&1/4th cup water.  Set aside for around 10-15 mins.  Add a bit more water if it thickens too much.
  • Mix the dry ingredients thoroughly in a large bowl.  (As my pumpkin seeds had added celtic sea salt, I did not add salt.  You may want to add some salt if you are using plain pumpkin seeds).
  • Fold in the flax egg, coconut oil and molasses until well-combined
  • Pat the mixture in to the tray and smoothen the surface with a flat spatula
  • Bake for 20 minutes
  • When it has cooled a bit, scour in to bars.  Let cool completely and store in an airtight container

Goji Berry Energy Bars

V did not super love this new recipe as much as last week’s but was still pleased that his breakfast routine remained unchanged.  I would go with almond flour and coconut sugar if I make this again. But both of us really loved the addition of the colorful red goji berries which gave a tart sweet taste to the bars!  

Goji Berry Energy Bars

Low-carb Grain-free Coconut Flake and Multi-Seed Protein Bars

Ever since I heard about Unprocessed: My City-Dwelling Year of Reclaiming Real Food by Megan Kimble I wanted to Here’s why.  I constantly worry about the amount of processed, packaged foods we consume these days.  The reason is two-fold:  One, because of the toll it takes on our body due to all the chemicals and two, because of the toll it takes on the environment due to amount of packaging that is used, and the distance food travels to be processed and then shipped to us.  However, I get overwhelmed at the thought of making everything on my own every single time – things we consume regularly like hummus, tofu, nut milk, nut/seed butters, protein bars, as well as things we consume occasionally like roasted chestnuts.


My dear friend, K, is quite amused at my predicament, and says that it is absolutely not difficult to make everything on your own if you wanted to. But then K is a super woman, truly one of a kind, the kind who will roast and peel chestnuts when they are in season at great anguish to her fingernails.  But me (and others like me) have to deal with using packaged foods for the sheer convenience of it, and keep swatting that worry at the back of our minds.

That is why it is so refreshing to read  “Unprocessed“.  I am still in the middle of it, but I was relieved to see that the first thing Megan Kimble does is to spell out what unprocessed means. At a high level, it is just stuff that she “theoretically” cannot make in her own kitchen.  Phew!!!!  What a relief.  By that definition, I don’t have to worry about buying hummus now as long as the ingredients are basic.

Here’s something that we usually pick up at the store that I whipped up in our kitchen.  V is on a low-carb diet these days and cannot eat most of the store-bought protein bars, which either have too many carbs or too much sugar (same thing by the way).   Hence, this (rather successful) experiment in making them.  I whipped up my own recipe as most of the recipes online had oats or quinoa or some grain as the base

Recipe for Home-made Coconut Flake and Multi-seed Protein Bars

[Printable Recipe]

Dry Ingredients:

Wet Ingredients:

  • 1 cup water to make flax-chia egg:
    • 6 Tbsp ground flax seeds
    • 2 Tbsp chia seeds
  • 1/4 cup coconut oil
  • 1/4 cup organic blackstrap molasses

Method:

  • Pre-heat oven to 375C
  • Dot a 9×13 inch pan with coconut oil and line with parchment paper
  • Make the flax-chia “egg” by mixing the ground flax seeds and chia seeds with 1 cup water.  Set aside for around 10-15 mins.   Add a bit more water if it becomes too thick.
  • Mix the dry ingredients thoroughly in a large bowl.

(I did not add any salt as the Go Raw Sprouted Pumpkin Seeds I used had celtic sea salt added.  You might need to add some if you are using plain pumpkin seeds).

  • Fold in the flax-chia “egg”, coconut oil and molasses until well-combined
  • Pat the mixture in to the tray and smoothen the surface with a flat spatula

  • Bake for 20 minutes
  • When it has cooled a bit, scour in to squares.  Let cool completely and store in an airtight container

It was pretty simple to make, except for the fact that I brought out the whole pantry and used up every healthy ingredient I laid my hands on!  V loved it and meticulously calculated the number of carbs in each bar.  (Turned out the coconut sugar had more sugar than the carbs in all the other ingredients combined.)   However, I expect it will serve as quite a substantial snack after a strenuous hike.  It would also be great for a mid-afternoon snack craving or a grab-and-go breakfast!