Stuffed Pita Sandwiches with Sauerkraut

Sunday has been an absolute scorcher here in Northern California!  After a rather gentle spring with a gradual and smooth increase in temps, we are back to the yo-yo weather that tormented us last year. What is one to do but hunker down indoors with windows and doors closed and blinds drawn, trying to keep as cool and still as possible.  To this end, I kept lunch a simple affair with minimal need for heat.


Back in March when the weather was a lot cooler, and we were in the throes of beginning the Veggie Sutra series on Brassicas, I turned to the humble cabbage for a warming, and hearty sauerkraut soup. Surely, cabbage, the most iconic of brassicas, is worth featuring more than once in our Brassicas series.

So here goes:  The recipe today also uses cabbage in the form of sauerkraut.   Before our current obsession with brassicas, we did a whole series on fermentation, and as part of that I had posted a fool-proof recipe for making sauerkraut.   But if you still find it daunting to make sauerkraut, you can find home-made sauerkraut in farmers markets and health food stores.  Sauerkraut has become a staple at our place and just to complete the picture, apart from eating them by the spoonfuls and using them in soups and sandwiches, we also make yummy salads with sauerkraut, like this Steamed Broccoli Salad with Sauerkraut.


As an aside, people who follow the blog regularly know my fancy for using fresh herbs from the garden in spring and summer.  Today’s sandwich uses a spread made with fresh basil from the garden.  But if you don’t want to make the spread, you could also simply stuff the sandwich with a handful of herbs – basil, mint, cilantro, parsley, or whatever you have growing in the pot.


Recipe for Stuffed Pita Sandwiches with Sauerkraut

[Printable Recipe]

Serves 2 people with 2 half pockets each

Ingredients:

  • 2 whole wheat pita bread cut in to halves
  • Sun-dried tomato with Fresh Basil Spread (recipe below) (Alternately use your favorite store bought spread)
  • 2 store-bought veggie burgers like Trader Joes Quinoa Veggie Burgers, cooked as per package instructions
  • About 4 Tbsp Shredded pepper jack cheese (optional)
  • About 8 Tbsp sauerkraut (recipe here)
  • 2 handfuls of spinach, arugula or any summer greens
  • For the Sun-dried tomato with Fresh Basil Spread:
    • 1/4 cup sun-dried tomatoes packed in olive oil with a fair amount of the oil
    • 1/4 cup soft cheese
    • A big handful of fresh basil leaves, washed
    • More olive oil if needed

Method:

  • Make the Sun-dried tomato with Fresh Basil spread:  In a food processor, process all the ingredients until smooth, adding oil as needed. Scrape and store in an airtight container. Alternately use a store bought spread like hummus (for a vegan sandwich) or a cheese spread or pesto.
  • Assemble the sandwich
    • Open up the pita pocket half and spread generously with the spread that you are using
    • Cut the cooked burger in half and stuff half in to each pita pocket
    • Sprinkle with about a tablespoon of shredded cheese (omit for a vegan sandwich)
    • (Optional) Pop the sandwich in to a toaster oven for a few minutes now for the cheese to melt and to warm up the pita bread.  If it is a warm day, you may skip this step.
    • Fill with about 2 Tbsp of sauerkraut and some of the greens
    • Serve with an ice-cold drink


You can get pretty creative with sauerkraut sandwiches and include any fresh summer vegetables you may have on hand like sliced cucumbers, avocado, radishes, and/or a variety of herbs.  We were pretty satisfied with this simple sandwich plus some ice-cold sparkling water with lemon and salt.

Oat Bars with Peach Jam Filling

Just imagine what the Silicon Valley might have looked like about 50 years back.  Back then it was known as the Valley of Heart’s Delight for its natural beauty, temperate climate and acres of arable land producing the sweetest stone fruits like plums and peaches and apricots.   As one drives through the streets and highways, one can still see signs of this fruitful past, from the scattered existence of small orchards that are left behind.   Every home has at least one citrus or stone fruit tree which yields more than enough to eat, preserve and share with neighbors.

Peaches

How can one resist the juicy allure of these fruits – the soft peaches, the vibrant apricots, shiny nectarines, deep red plums, not to mention wonderful cross breeds like pluots and apriums and what not!  In summer, the farm stands along the Central Valley highways and local farmers markets display a colorful variety of these “drupes“, which is what such stone fruits are called.  And towards the end of summer when the fruits are at the peak of their sweetness, I give in and end up making at least one batch of jam for nostalgia sake.

Time seems so scarce in today’s Silicon Valley that many do not bother to even pick the fruits in their backyard leave alone preserve for winter.  In Michael Pollan’s “Cooked”, he talks about “real scratch cooking” becoming as rarefied as darning socks.   When I lived in the Sacramento area, making several batches of jams and preserves towards the end of summer was de riguer,  a fun activity usually done with a group of friends.  My friend K, the uber expert in cooking anything and everything from scratch, used to have a bunch of us girls over for ‘jamming’.   Sigh! What fun that was!

Peach Jam

This year my nod to nostalgia was a small batch of chunky peach jam with the sweetest peaches one can sink their into.  V and I really do not consume that much jam not being big toast eaters for breakfast.  So I use the jam for desserts, mostly as a compote topping for puddings or ice creams.  Or I give it away to friends and family.

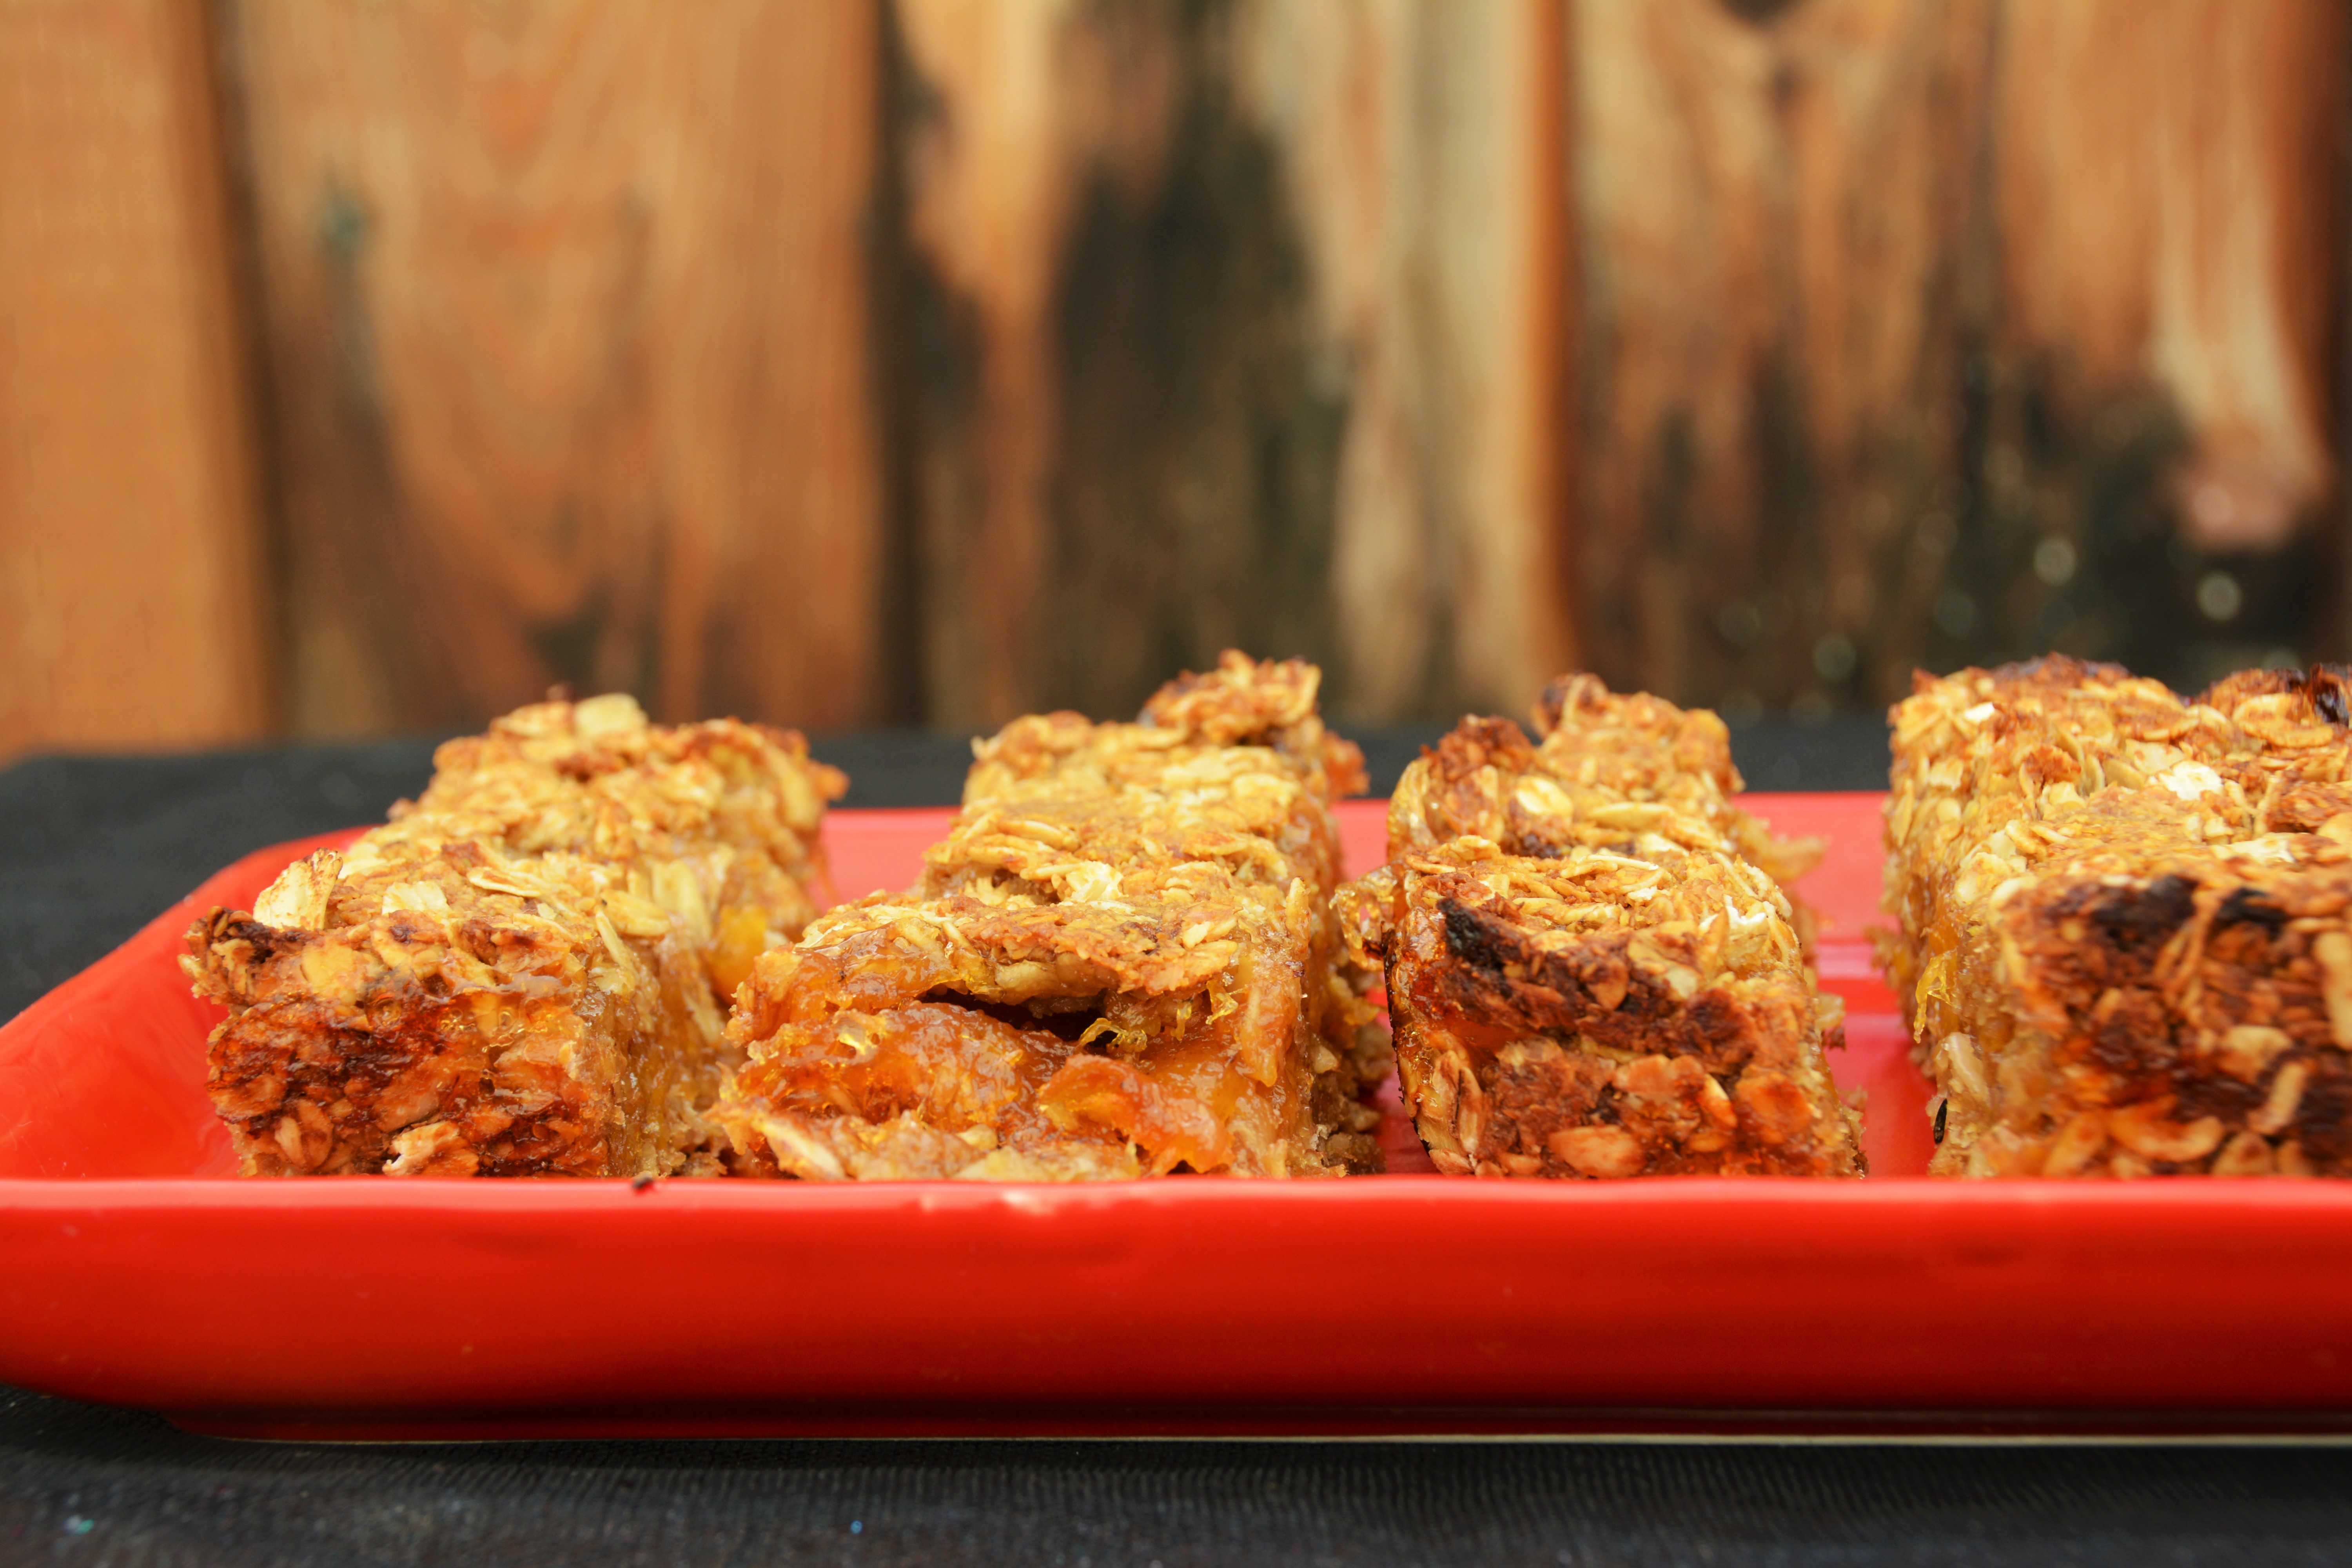
Oat bars with peach jam filling

What came together this time was a chewy oat bar with a tart, sweet chunky peach jam filling.  The crust itself is not too sweet at all as it contains no sugar whatsoever, though it is lightly sweetened with fruit sauce.

Recipe for Oat Bars with Peach Jam Filling

[Printable Recipe]

Makes around 15 bite sized squares

Ingredients:

  • 1/2 cup store bought apple sauce or home-made apricot or date sauce
  • 1 1/4 cup rolled oats (not quick cooking, buy gluten-free oats if you are sensitive)
  • 3/4 cup ground flax seeds / flax meal
  • 1 tsp salt
  • 1 tsp powdered ginger
  • 1/4 cup melted coconut oil (use melted butter if you are not vegan)
  • Optional: 1/3 cup of brown sugar if you like some more sweetness in the crust
  • 1 cup chunky peach jam

Method:

  • Preheat over to 375F
  • Dot a 9″x5″ loaf pan with coconut oil and line with parchment paper such that some of the paper hangs over the sides like a handle
  • To make apricot or date sauce, soak 1/2 cup of pitted dried fruit in hot water for 30 mins. Drain and grind well in to a paste using a few tablespoons of water to get sauce consistency
  • Combine the dry ingredients in a bowl
  • Add the fruit sauce and coconut oil and fold.  Divide in to two parts
  • Using fingers, press half the oat mixture in to the prepared loaf pan
  • Spread the peach jam evenly on top
  • Distribute the remaining oat mixture on top of the jam and press
  • Bake for 30 mins
  • Let it cool and cut in to bars or squares.  I got about 15 small bite-sized squares from the loaf pan

Oat bars with peach jam filling

The bars were just perfect with the right amount of sweetness and tartness from the peach jam and chewiness from the oat-flax mixture.   And just the most perfect grab and go snack.

Vegan food in Southern California + Basil Pesto with Habanero Peppers


basil-habanero-pesto-2-2

Before I get to the basil pesto recipe, let me rave about our trip down south.  The Labor Day weekend was rather pleasant, so V and I decided to do a mini getaway from beautiful northern California to gorgeous southern California.  Why travel to far places to vacation when the whole world travels here to vacation?    I would not normally venture in to Southern California in the summer months, but it has been cooler than normal this summer.  Santa Monica and Venice are just perfect – beautiful beaches, beautiful people, beautiful weather, and cars, cars, cars everywhere!


santa-monica


I did not realize Los Angeles and Santa Monica have become such a haven for restaurants serving plant-based food exclusively.    Walking around downtown Santa Monica we chanced upon Erven, which opened just a few weeks back.  The chef, Nick Erven, though not vegan himself, has created some amazing dishes – one that still haunts my memory is the black garlic chickpea fritter with yuzu.  That is going down in the books as the most creative vegan dish ever.  I hope Erven does well.

We also went to True Food Kitchen, although this is not an exclusively vegan or vegetarian restaurant.  How could we not?  The menu is influenced by Dr. Andrew Weil’s anti-inflammatory diet, and V has been a big fan of Dr. Andrew Weil for a long time, and follows several of his key recommendations.  The main course was great, but the high note was the “Strawberry-rhubarb crisp almond crumble” dessert.  We both fought over it until the last bit had been licked off!

The third noteworthy restaurant we visited in the area was Plant Food + Wine in Venice, CA.  Most of the ingredients used are grown locally (in fact some of the herbs are grown right there in the backyard of the restaurant). The menu is very experimental with some dishes hitting the mark, and others not so much.  But the plating was uniformly delectable.The outdoor seating was befitting a restaurant serving local southern California cuisine.

The great part is that you really don’t have to be a vegan or vegetarian to enjoy the great food down there in southern California!


basil-habanero-pesto-4


Now on to some cooking with local ingredients from our backyard to our kitchen.  It is nearing the end of summer and everything in our tiny garden patch is ripe for picking.  Amma and I have been picking, blanching and saving tomatoes for the winter.  And we had a decent crop of eggplant and bell pepper which we consumed then and there.  Is there anything more refreshing than cooking with freshly picked vegetables from the garden?   Speaking of which, I went in to total ecstasy when I harvested a huge bunch of fragrant purple basil.   And I knew I had to make pesto, nothing but pesto, for now and for later.


purple-basil1


This time, I added a small twist to the pesto, and it is all because of V.   He planted a habanero chili plant which has gone crazy with yield and I have no clue what to do with all that spiciness.  Please do help me with suggestions!   I snuck in a couple in my batch of pesto.  If you like spicy food, then you will love this variation.  If not simply leave out the peppers.


habanero-peppers


Recipe for Basil Habanero Pesto

[Printable Recipe]

Ingredients:

  • 4 cups basil leaves
  • 1/4 cup pine nuts
  • 5-10 cloves garlic (yeah I went crazy with garlic and used up a whole bulb, you could tone in down a bit)
  • 2-3 Habanero peppers (optional)
  • 1/2 cup olive oil + a bit more for drizzling on top
  • 1 cup freshly grated parmesan cheese
  • salt to taste

Method:

  • In a food processor, combine the basil, nuts, garlic and habanero peppers (if using)
  • Add the olive oil slowly through the feed tube
  • When fully processed, add the parmesan cheese, salt to taste and more olive oil if you want the consistency to be thinner.  Pulse to mix
  • Scoop out in to a couple of bottles and drizzle some olive oil to cover the top
  • Freeze whatever you will not consume in a week or so for later use


basil-habanero-pesto-3


Pesto is quite versatile and gets consumed in so many ways in our home.  We use it in pasta on the rare occasions that I make pasta or noodles (V is not a big fan), as a spread for sandwiches and mini pizzas, and as a dressing for salads.   We freeze part of the pesto for use in the dreary winter months when a whiff of good pesto reminds you that summer will roll around soon, doesn’t it?

Very Spicy Fresh Chili Relish

It took the spicy goodness of fresh chilies to kick me out of the writer’s block I have been facing as I am battling with redesigning the blog site.  Ready or not, I decided I was just going to post about this awesome relish.  Just a whiff of it is guaranteed to spice up your meal!


fresh chili relish 2
Super Spicy Fresh Chili Relish


Now that V and I have started going regularly again to our local farmers market for fresh produce, I feel more in my zone.  During the period when we were not able to go to the market, I signed up for the CSA box .   The box was delivered right to our home and all the vegetables (rainbow carrots, shishito peppers, red cabbage, et al) were super-fresh and good, but somehow I was not satisfied.  I have come to the conclusion that I need to touch and feel the vegetables and talk to the farmers to make it a personal experience.  Still, I guess I should be thankful I have the option to get the CSA box if I had to.  One of the several perks of living in California!

Last Saturday, V and I walked 3 miles to the farmers market and walked back with a big chili bush with green, orange and red chili peppers poking out of V’s backpack like a super cool bouquet.   I was skeptical about buying the plant, but V was enamored with it, and the whole plant cost just a dollar and he said he would carry it back, so I gave in!   Luckily we got a call from our super resourceful foodie friends (who are also great cooks) the next day, and within a minute, I got my recipe idea!


chili art


If you cannot handle any heat at all, I suggest you skip to the next post, because this one is SPICY!!   Eat just a bit with each meal.  This relish will keep in the refrigerator for a couple of weeks.  In South India, it is often eaten as a side for white rice mixed with plain yogurt – the starch from the white rice and the coolness of the yogurt compliment the heat of the chilies in every way making for the perfect comfort food!

Recipe for Very Spicy Fresh Chili Relish

[Printable Recipe]

Courtesy of our friend, V S and Dakshin, Vegetarian Cuisine from South India

Ingredients:

  • About 500 gms or 1 lb fresh green, orange and red chilies (use a thin long spicy and fragrant variety like Thai, Indian or Cayenne)
  • 2 Tbsp pure organic sesame oil
  • 4 Tbsp rapadura sugar or powdered jaggery (available in ethnic Indian grocery stores)
  • 4 Tbsp tamarind extract (Use 2 Tbsp mixed with warm water if using a concentrate – again available in ethnic Indian grocery stores)
  • Kosher salt to taste

Method:

  • To prepare the tamarind extract from fresh tamarind, take a ping pong ball sized amount and soak it in warm-hot water for 10 minutes.  Use fingers to extract pulp and discard the skin and fibers.  If using concentrate, simply mix with warm water.
  • De-stem and wash the chilies and dry them.  Slit them lengthwise without splitting them fully apart and set aside
  • Heat the sesame oil in a wide saute pan
  • Add the chilies and cook on medium heat while turning them occasionally until they blister well on all sides (about 15-20 mins)
  • Add the salt, tamarind extract and jaggery / rapadura sugar and cook on low heat until the tamarind cooks down (about 30 mins).  Stir occasionally to make sure the bottom does not burn
  • Switch off, bottle and store in refrigerator

Notes:  Based on the spiciness of your chili peppers, you may need to adjust the amount of tamarind and jaggery up or down.


fresh chili relish 1
Super spicy fresh chili relish


The tamarind adds a wonderful tangy note, while the jaggery / rapadura sugar adds the caramelized sweet notes, but don’t be fooled, even a slight whiff of this relish will let you know that it is hot, hot, hot!    Consume just a bit with lot of starches like plain white rice or plain cooked lentils or with rice and yogurt for a flavor punch!

Chinese-style Spicy Eggplant Basil Stir Fry

Earlier this year, V and I became proud owners of a cast-iron wok that we purchased at The Wok Shop in San Francisco.  We have treated it pretty well and hopefully it is developing a nice patina with all the quick stir fries we have made, as vegetarian Chinese food is one of V’s favorites.

Eggplant Basil Stir Fry

Our main guidebook for using and caring for the wok is The Breath of a Wok by Grace Young and Alan Richardson.  The title of the book is a metaphorical translation of wok hay, which is the indescribable essence and energy a well-cared-for wok imbues in to the food cooked in it as I had mentioned in an earlier post.  The book also has a lot of interesting ‘wok-lore’ and beautiful pictures of artists making woks and cooks using woks.

V is not a big fan of eggplant, mainly because he thinks it is always cooked with too much oil.  This is why I have been mostly giving away the Asian eggplant growing super-productively in our garden. This weekend however, when I harvested a bunch of eggplant and basil, I asked V to please make a stir fry. Predictably he declared he would not touch the eggplant but will make a stir fry with just the carrots and celery I had cubed to go with the eggplant!   So, I banished him from the kitchen and took over.

Basil & Chinese Eggplant in our garden

In the end, V thoroughly enjoyed the stir fry and declared that it was the best eggplant he had ever had! This is how I won him over – the trick to make sure the eggplant is not too oily is to steam it for about 5 minutes before stir frying it.  The idea came from a recipe for “Spicy Garlic Eggplant” in The Breath of a Wok.

Eggplant Basil Stir Fry

Recipe for Spicy Eggplant Basil Stir Fry
Adapted from a recipe for Spicy Garlic Eggplant in The Breath of a Wok by Grace Young and Alan Richardson
[Printable Recipe]

Ingredients:

  • 5-6 medium Asian eggplants, cut into 2 inch long pieces
  • Sauce:
    • 1/4 cup soy sauce (check if it is gluten-free if you are allergic)
    • 2 Tbsp balsamic vinegar
    • 2 Tbsp ‘Shao Hsing’ rice wine (you can find this in an ethnic Asian grocery store)
    • 1 tsp brown sugar
    • 1 tsp salt 
    • 1/2 tsp black pepper
  • 3-4 Tbsp vegetable oil or sesame oil
  • 5-6 large cloves garlic, minced fine 
  • 2 inch piece ginger, grated
  • 5-6 whole dried red chilies soaked in warm water for around 10 mins and drained
  • 2 medium carrots, cubed
  • 3-4 stems of celery, cubed 
  • 1 tub (12 oz) of extra firm tofu, drained thoroughly by pressing, and cubed
  • 1 huge bunch of basil, chopped
  • 1 tsp toasted sesame oil for drizzling (you can find this in an ethnic Asian grocery store)
Method:
  • Use a steamer and steam the cut eggplant for around 5 minutes
  • Mix together all the ingredients for the sauce and set aside
  • Heat the oil in a wok and add the garlic, ginger and soaked red chilies and fry for half a minute
  • Add the cubed carrots and celery and fry for a couple of minutes
  • Add the cubed tofu and steamed eggplant and fry for half a minute
  • Now stir the sauce in to the wok and cook for about a minute until the eggplant has soaked up the sauce
  • Switch off the heat and stir in the basil
  • When the basil has wilted, remove from wok in to serving platter and drizzle with sesame oil
  • Serve with steamed white rice
Eggplant Basil Stir Fry

The fact that V ended up enjoying the stir fry so much made me think of how different we are in the kitchen.   Even though he makes awesome stir fries (he is good at not cooking the vegetables too long), V would never have ‘adapted’ such a recipe.  V is so “by the book” that he drives me crazy by refusing to budge even if a single ingredient in the published recipe is missing.  I, on the other hand, go in with an outline of a recipe and use whatever I have at hand.    What sort of cook are you?

Stir-fried Traffic Light Bell Pepper Curry

It has been a hectic weekend and I had almost given up on posting anything this weekend, but when I made this beautiful traffic light (red-orange-green) bell pepper stir-fry curry, I could not resist clicking pictures.
So, what do you all think of microwave ovens and their safely?   I haven’t made up my mind yet, but the convenience factor sure is unbeatable.  Every weekend, V and I prepare enough food to last us for about 3 or 4 days into the week.  We store this in the refrigerator in Pyrex glass containers, so that we can reheat in the microwave oven.
(As an aside, reheating anything in plastic containers, even the so-called BPA-free ones, in the microwave oven is a no-no in our house. We even avoid plastic lids and use a glass plate to cover the food if needed.)
Anyway, our 9-year old microwave decided to conk out on us and we spent all of yesterday hunting for a new one that we liked.  And that is why I had almost decided to drop my plans to post anything this weekend.  And then this beautiful bell pepper stir-fry came about!
My go-to reference book for food that tastes like amma’s cooking is Chandra Padmanabhan’s Dakshin: Vegetarian Cuisine from South India.  Not only do I own two copies of the book (an Indian edition and a US edition), I have also gifted it to numerous friends.  This recipe is from yet another delicious book by the same author called Simply South: Traditional Vegetarian Cooking, which covers a broader region in Southern India.
Recipe for Stir-Fried Traffic Light Bell Pepper Curry
Adapted from Simply South: Traditional Vegetarian Cooking by Chandra Padmanabhan
[Printable Recipe]

Ingredients:

Method:
  • Heat the coconut oil in a wide pan, preferably cast-iron, or an iron wok
  • When the oil is hot, add the mustard seeds, and when they start spluttering, add cumin seeds, red chilies and curry leaves
  • Add the chopped bell pepper and stir on high heat for 2 minutes
  • Then lower the heat, cover and let it cook for around 7 minutes (you can do less if you like the bell pepper to have a bit of crunch)
  • While the bell pepper is cooking, mix together the chickpea flour, coriander powder, chili powder and salt to taste
  • Uncover the pan or wok and sprinkle on the mixed spices and stir till well distributed
  • Increase the heat to medium and continue stirring for 4-5 minutes until the curry is completely dry
  • Switch off the heat, transfer to a serving bowl and serve hot with white rice
Notes:

  • Next time I may try making this stir-fry curry with just green bell peppers.  I did not care for the sweetness of the red and orange peppers as much, although V loved it.
  • In the book, Chandra Padmanabhan recommends mixing the spices and chickpea flour with a little oil in to a flaky mixture before sprinkling it on the curry.  I tried this last time and it did not work as well, so I decided to sprinkle on the dry mixture and add oil if necessary.
  • You can find all the spices and chickpea flour in your local ethnic Indian grocery store.

A satisfying stir-fry curry, best eaten immediately after cooking (does not hold up well when microwaved).  And that’s what we did – we ate it all, right away with white rice and a dollop of ghee.

Seasonal Vegetarian Recipes: Summer in California

It is mid-summer already and the weather has been erratic.   After the smoking heat of last weekend, this one has been very pleasant.  In fact when we had friends over yesterday, we sat outdoors in the patio and it was very pleasant.   The drought however persists and has even worsened.   With careful watering by hand, my summer vegetables have done pretty well in the garden – I have tomatoes, green beans and eggplant this year (all quite productive) and the little collard seedling I bought in Temescal is now a tree!

Peppers galore at the Sunnyvale Farmers Market

Our wonderful farmers market has cucumber, bitter melon, bottle gourd, snake gourd, okra, eggplant, a variety of peppers, tomatoes, summer squashes, and a variety of beans this summer!   The fruits have also been great – we have overdosed on tons of really sweet stone fruits (did you know they are called drupes?) like plums, pluots, apricots, peaches and nectarines, in addition to red juicy strawberries and avocados (yes they are a fruit!)

California-grown Organic Strawberries!

Here is a compilation of the seasonal recipes I cooked up this summer with the produce from the garden and our beloved farmers market.

Drinks:
Cleansing Juice
Ginger-Mint Shrub
Strawberry-Mint Shrub
Kefir-Blueberry Smoothie

Ginger-Mint Shrub

Sides:
Ethiopian Collard Greens
Watermelon Rind Curry

Roasted Summer Squash with Scallions

Main Dish:
Chopped Summer Salad

Enchiladas with Spicy Fermented Salsa

Desserts:
Chia Seed Pudding with Blueberry Compote
Sugar-free ice cream with pluot jam topping

Chia Seed Pudding with Blueberry Compote

How has the summer bounty inspired your cooking?  Have you saved any produce for the cold season?   Do share!

Pretty in Pink – A Cool Summer Lunch Menu

It has been a scorching, smoky weekend in Northern California leaving me with no desire to cook over a fire.  A simple, cooling lunch that can be put together without turning on the stove or oven is what I was looking for.

My inspiration came from a book I am currently reading called Lunch at the Shop by Peter Miller.  It is about the simple, elegant mid day meals that he and his coworkers prepared in the backroom of his book shop without access to an oven or stove.  The trick (I gathered) is to have some precooked foods like rice, lentils and beans available in the fridge, and basic ingredients like olive oil, lemons and dried herbs in the pantry.  Add fresh seasonal produce to this, and a gourmet meal will come together in no time!

Sugar-free “ice cream” with pluot jam topping

And so it came together – a pretty-in-pink healthy, cooling summer lunch complete with dessert!   Here is the menu:

  1. Lunch-sized chopped salad with cooling vegetables
  2. Strawberry-mint shrub sparkler
  3. Sugar-free “ice cream” with pluot jam topping
Strawberry Mint Shrub Sparkler

Before I get to the super-simple recipes, a confession!  The sauerkraut I started 2 weeks back did not turn out well.   There is a guy in our wonderful year-round farmer’s market who sells this amazingly tasty sauerkraut.  Mine was a 2-year old’s doodle compared to his Monet!  I think I know where I went wrong, so I will try again, undaunted!

A summer salad

(1) Recipe for A Chopped Summer Salad with a simple lemon dressing

[Printable Recipe]

Inspired by ideas from Lunch at the Shop by Peter Miller.


Ingredients:

  • 1 long Persian cucumber or 3-4 small ones, seeded and chopped 
  • 1 cup of grape or cherry tomatoes, cut in to 2
  • 1 small red onion, chopped
  • 1 cup of chopped red cabbage
  • 1 avocado sliced in to wedges or cubed
  • Dressing:
    • 3 Tbsp lemon juice
    • 4 Tbsp olive oil
    • pinch sea salt
    • pinch black pepper
    • 1 Tbsp finely chopped basil leaves or cilantro leaves
  • Some toasted nuts (almonds, walnuts) or seeds (sunflower, pumpkin) to garnish (optional)
Method:
  • Whisk together all the dressing ingredients except herbs.  Mix in the herbs and set aside
  • Combine in a bowl all the chopped vegetables 
  • Pour the dressing over it and toss to coat evenly, garnish with nuts if desired and serve
Notes:
1) Use any summer vegetables you have at hand and don’t be limited to the ones I used.  Bell pepper (red or green), greens of any kind, cooked (or canned) beans, lentils or chickpeas, grated carrots or beets, cooked wild rice or quinoa, and radishes are some choices.
2) You can use balsamic vinegar instead of lemon juice in the dressing if you wish and also make the dressing more interesting by adding grated ginger or dried oregano.
3) Did you know that both cucumber and red onion are cooling vegetables?  So is lemon juice.

Strawberry Mint Shrub

Back in May, with the advent of an early summer here in California, I made a Ginger-Mint Shrub as part of the Veggie Sutra’s Fermentation Series.  V and I loved it so much that it has become our go-to summer drink.  That was my first attempt at making shrubs and therefore I followed the original recipe by Mary Karlin in Mastering Fermentation by the book, so to speak.   This time I substituted the ginger with strawberries.   After all, what’s more summery than strawberries?  

(2) Recipe for A Strawberry-Mint Shrub Sparkler
Adapted from Mastering Fermentation by Mary Karlin
Makes enough for around 6 people
Ingredients:

  • 1/2 cup chopped very ripe strawberries, smashed slightly
  • 1/2 cup packed fresh mint leaves + a couple of sprigs of fresh mint
  • 3/4 cup raw organic apple cider vinegar (use one with live mother cultures like Bragg Apple Cider Vinegar)
  • 1/2 cup freshly squeezed lime/lemon juice
  • 1/2 cup raw unrefined cane sugar
  • 1 bottle of sparkling water
  • A few ice cubes if you like
  • Plus about 2 weeks of patience!
Method:
I am going to be lazy here and ask you to refer to my post on Ginger-Mint Shrub.  It turned out very well, and the original recipe has step-by-step photos as well.  Just substitute strawberries for ginger. Other interesting combinations to try: Apricot-Mint or Apricot-Basil, Peach-Mint, and Mango-Mint (use fresh mango).
Banana-Date Ice Cream with Pluot Jam Topping
This year, the California-grown stone fruits that we get at our farmer’s market have been extra-sweet, apparently a consolation prize for the persisting four-year drought.  I could not resist making a batch of summer fruit jam, even though V and I are abstaining from eating any added sugar these days.  Well, I usually give away most of the jam I make, so I don’t feel so bad!  I used some of the jam to top a sugar-free dessert giving it a pretty pink look as well a sweet and tart finish. 
(3) Recipe for a Sugar-free “ice cream” topped with home-made pluot jam
Makes generous portions for 2
Ingredients:
  • For “Ice Cream” 
    • 2 overripe bananas which have been frozen ahead of time, thawed slightly to peel and chop
    • 1/2 cup pitted and chopped dates
    • Up to 1/4 cup creamy coconut milk as needed
  • For topping
    • Some toasted pine nuts and raisins
    • Home-made pluot (or any summer fruit) jam (I used this recipe, with a slight variation of spices)
Method:
  • In a powerful blender or food processor, add the banana and dates.  Blend until smooth, scraping down the sides every now and then, and adding a little bit of the coconut milk at a time if needed
  • Scrape into a container with a lid, and freeze for around 6 hours
  • Scoop the “ice cream” into serving cups, top with pine nuts, raisins and a spoonful of jam and serve
Here is that pretty Pluot Jam
Summer is my least favorite time of the year, except for the abundant variety of produce that is available.  Which reminds me, I need to get more canning and freezing done before it is too late to save any produce for winter!   What are your favorite summer produce to save for winter and how do you do it?

Revisiting Fermentation: Red Cabbage Sauerkraut

Reduce, Reuse, Recycle.  Words to live by!  I felt quite happy that I had saved all the mason jars and glass bottles over time from store-bought honey, sauces and so on.  I ‘reused’ them to start off a few things to ferment in my kitchen.

Sauerkraut and Kefir

New York Times has made a short, visually appealing, wonderful documentary on Sandor Katz, the fermentation guru, aptly named “Sandorkraut: A Pickle Maker“.  After watching him digging with his bare hands in to a vat of sauerkraut, I was somehow moved to start my own batch.

Before this in Veggie Sutra’s fermentation series, I have attempted various fermented recipes, like shrubs, fermented salsa, South Indian lemon pickles, idlis, kefir and so on.  However, the most basic of fermented stuff, sauerkraut, the traditional fermented staple of Europe, had not make my list.  (It could have been because we have an excellent sauerkraut vendor in our local farmer’s market!)

Red Cabbage Sauerkraut

The sauerkraut recipe in Katz’s book, Wild Fermentation, was really simple.  All I did was to cut up a whole medium-sized red cabbage, massage it with salt to release juices, and pound it into in to a small bottle using my wooden buttermilk churner.   I promise to share notes after a few days when I have tasted it to see how it has turned out.  I also made a bottle of chopped cucumber pickle in approximately the same manner.  And a bottle of kefir is bubbling away in a corner as well.

Red Cabbage Sauerkraut

In other fermentation news in our home, V has become a huge fan of my shrubs.  He loved the Ginger-Mint Shrub and the Ginger-Chili shrub.  Last weekend, I started off a huge batch of Strawberry-Mint shrub, strawberries being so abundant now.  The shrub is right now in the last stages of fermentation.  I will post the recipe in a week if V approves of it!   But doesn’t it look delicious already?

Strawberry-Mint Shrub

Do visit Veggie Sutra’s Fermentation Series for all the recipes we have tried before.  However, to learn the basics of fermentation, get your hands on Sandor Katz’s The Art of Fermentation.  He is the guru and his is the go-to book for all things fermented.

Strawberry Mint Shrub

Don’t miss out on the amazing health benefits of fermentation.  And if you are already enjoying delicious fermented stuff regularly, do share your experiences!